I was going to title this post “Simple White Vine Borders” but when looking at the range and complexity of white vine work in manuscripts “simple” and “white vine” began to sound like an oxymoron.
Here are a few examples from the British Library Catalogue of Illuminated Manuscripts showing examples of simple to complex white vine work:
Burney 180 f. 130v – simple white vine in initial and partial border
Harley 2571 f. 2 – simple white vine border
Harley 2764 f. 1 – a little more complex partial border
Harley 2649 f. 1 – a variation of the above
Burney 244 f. 2 – 3/4 page border
Harley 4960 f. 1 – full page white vine border
I’m going to break this down into simple steps, but it should be considered an “intermediate” or “advanced” level of border work.
If you’ve followed the steps in some of my other borders – particularly the Full Spiral Border – then the steps in this border will be familiar.
We’ll be doing a variation of Harley 2764 f.1 because it can be “deconstructed” into simple elements.
Let’s get started!
Drawing the Border
What you need:
- pencil
- eraser
- graph paper – 5 squares to the inch. You can print out a free PDF graph paper file from Incompetech.com
- tracing paper
Although initially the border seems very complex, we can look for common repeated elements that are essentially “mirrors” to each other.
Step 1
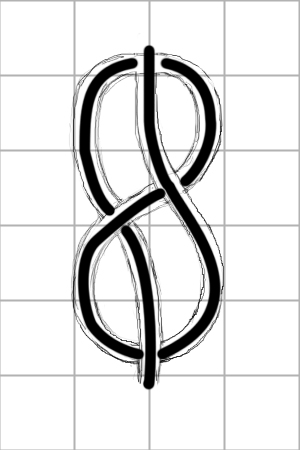
The most obvious element we can see is that the vines loosely follow an “8” shape with intersecting lines, so let’s draw that first on the graph paper.

Basic Shape
I’ve left “breaks” between the lines to show where the overlaps occur – you can plan it out like this or simply draw a continuous line and erase the overlaps later.
Step 2
Next we’ll pencil in lines around the basic shape so we have an outline.
Basic Shape with Outlines
Step 3
Now we can erase the center line and clean up the overlaps.
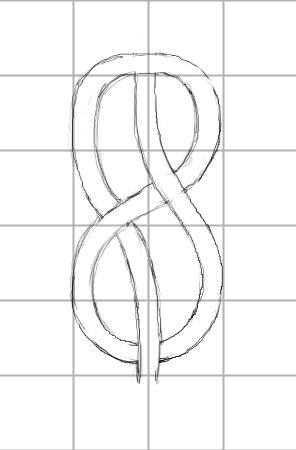
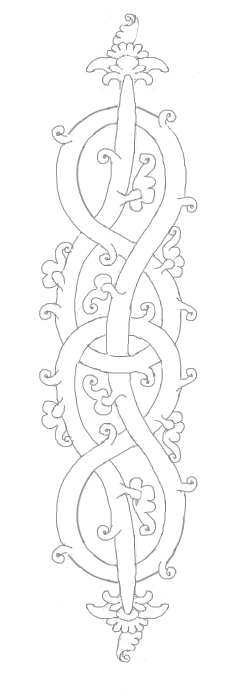
Basic Outline Shape
Step 4
Tracing paper time! Trace the outline onto a piece of tracing paper. Flip the tracing horizontally, line up over the first outline and graph paper, then trace it as shown in the example.

Example of Horizontally Flipped
Continue moving up the graph paper with a horizontal flip and trace over the last outline.

Horizontal flip over second outline
Continue tracing and flipping for as many as you need for your design requirements. Two or three should be enough for practice.
Step 5
Once you have the tracing completed, we need to “clean up” the drawing by having the vines move over and under each other by erasing extra lines.

Cleaned vines drawing
Take your time cleaning up the drawing. Follow the vines one section at a time, making sure that if a vine is “over” a section it will be “under” the next section.
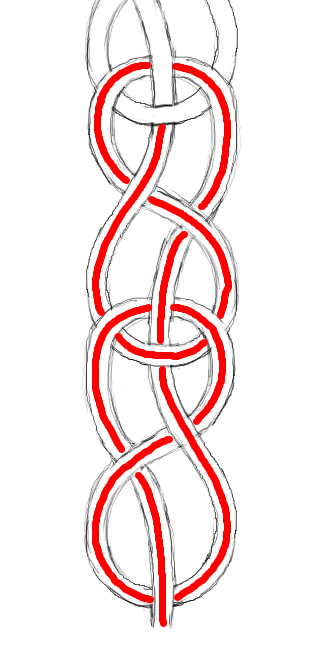
Over and Under
Step 6
Pencil in some leaves and buds around the outside and inside of the vines.
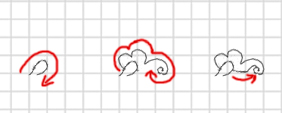
Simple Leaf Construction
Try to keep the shapes simple to start – you can always add more details later.

Simple Bud Construction
You can draw one or two, then use your tracing paper to “populate” the vines.
Adding Leaves
I’ve kept the leaves and buds relatively simple and used tracing paper to copy/rotate around and inside the design.
I made a few minor adjustments attaching the stems so that the leaves and buds fit around the spaces, then added larger leaves at the top and bottom to finish the ends.
Once you are comfortable drawing leaves and buds, I’d suggest drawing them freehand around the design to give the border a more organic, lively feel to it.
Looking at examples from British Library Catalogue of Illuminated Manuscripts will provide plenty of inspiration!
Step 7
Transfer your final drawing to watercolor paper for painting. I used Gouache with Ultramarine Blue, Viridian Green with a touch of White and Cadmium Red.
More information and basic instructions on tracing and painting can be found at the “Painting a Simple Initial” post.
Outline the design with either a light brown ink or paint with a small brush. You can also add in some small lines in the leaves for a little detail.
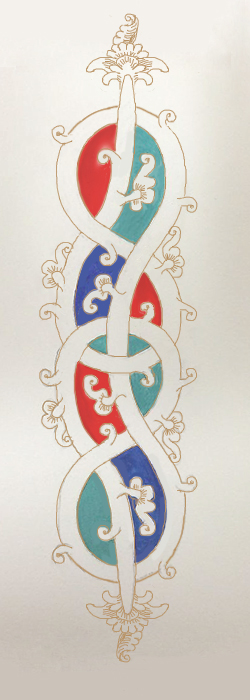
Outline and Painting
Let the paint dry, then lightly sketch about an 1/8″ pencil line around the outside. Fill in the outline with Ultramarine Blue, then you’re done!
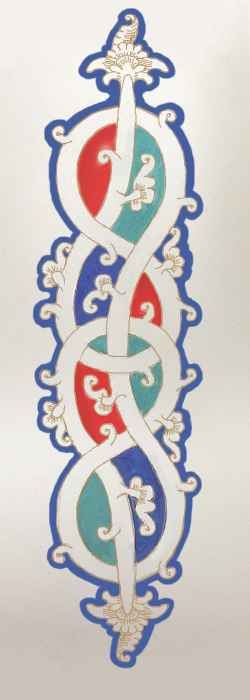
Blue Outline
A very nice step-by-step example of an Illuminated Letter with White Vine can be found at Kathryn Finter’s Contemporary Manuscript Illumination site.
